Getting Started
Purchase the Plugin
Purchase the plugin on the Fab Marketplace.
Install the Plugin
After purchasing, install the plugin for your Unreal Engine version through the Epic Games Launcher.
Enable the Plugin
Once installed, the plugin will be available in Unreal Engine under the Plugins section. Go to Edit → Plugins, search for "PloxTools: Google AdMob", and make sure it’s enabled.

Disable Other AdMob Integrations
Only one AdMob integration should be active in the project.
Disable any other third-party AdMob plugins, as they may add duplicate SDK dependencies, manifest entries, or platform code.
For Android, also disable Unreal Engine's built-in AdMob integration:
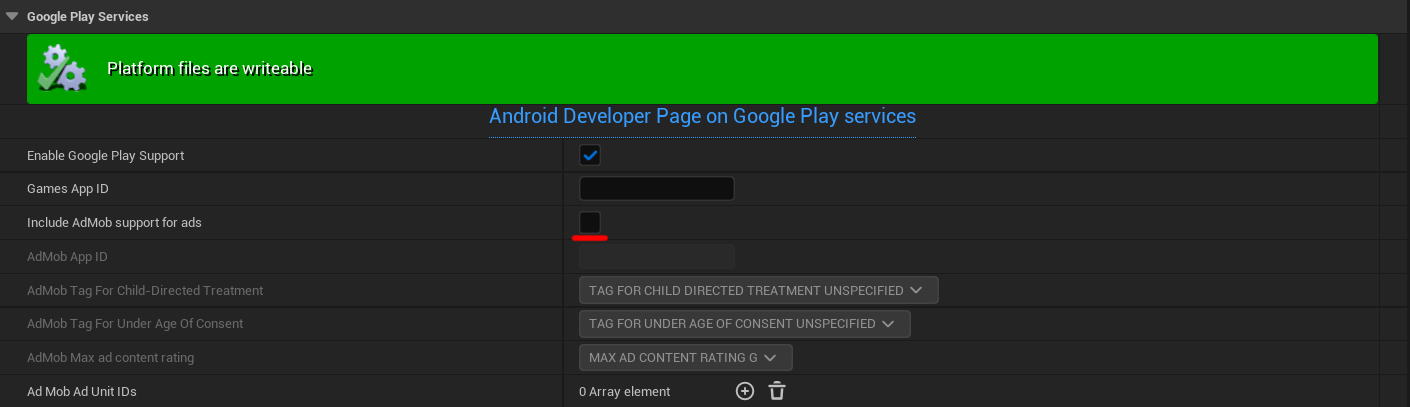
- Open Project Settings → Android → Google Play Services.
- Disable Include AdMob support for ads.
- Leave the built-in AdMob App ID and Ad Unit ID fields empty.
Note
If your project does not use Online Subsystem GooglePlay, it is recommended to disable it together with AndroidFileServer.
These plugins may add legacy Android dependencies and configuration files that can conflict with the Google Mobile Ads SDK included with this plugin.
Create Your AdMob Application
To use the plugin, you need an active Google AdMob account and an application registered in AdMob.
- Open the AdMob website and sign in with your Google account.
- Complete the AdMob registration process if required.
- In the AdMob dashboard, go to Apps → Add App.
- Select whether the application is already published.
- Select the target platform:
- Android for Android builds.
- iOS for iOS builds.
- Enter the application details and complete the setup.
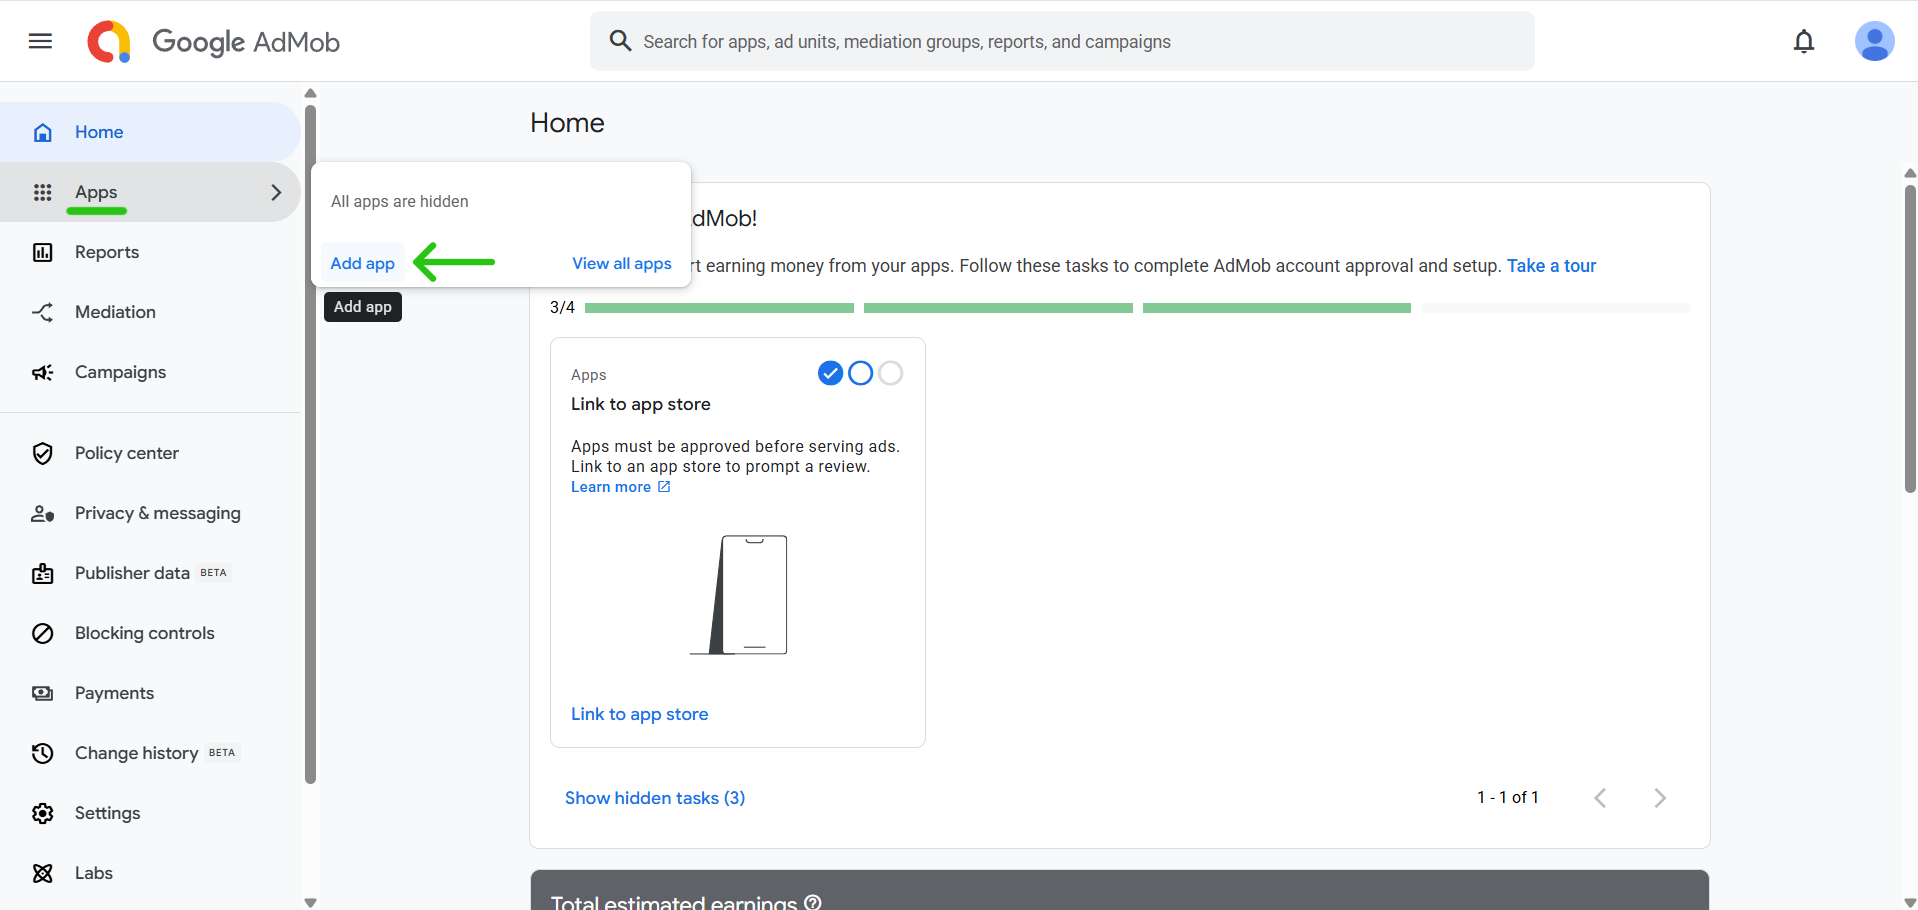
If your project supports both Android and iOS, register each platform as a separate application in AdMob.
Note
Android and iOS applications use separate App IDs and Ad Unit IDs. Do not use Android identifiers in an iOS build or iOS identifiers in an Android build.
Find Your AdMob App ID
Each application registered in AdMob has its own App ID.
To find it:
- Open the AdMob dashboard.
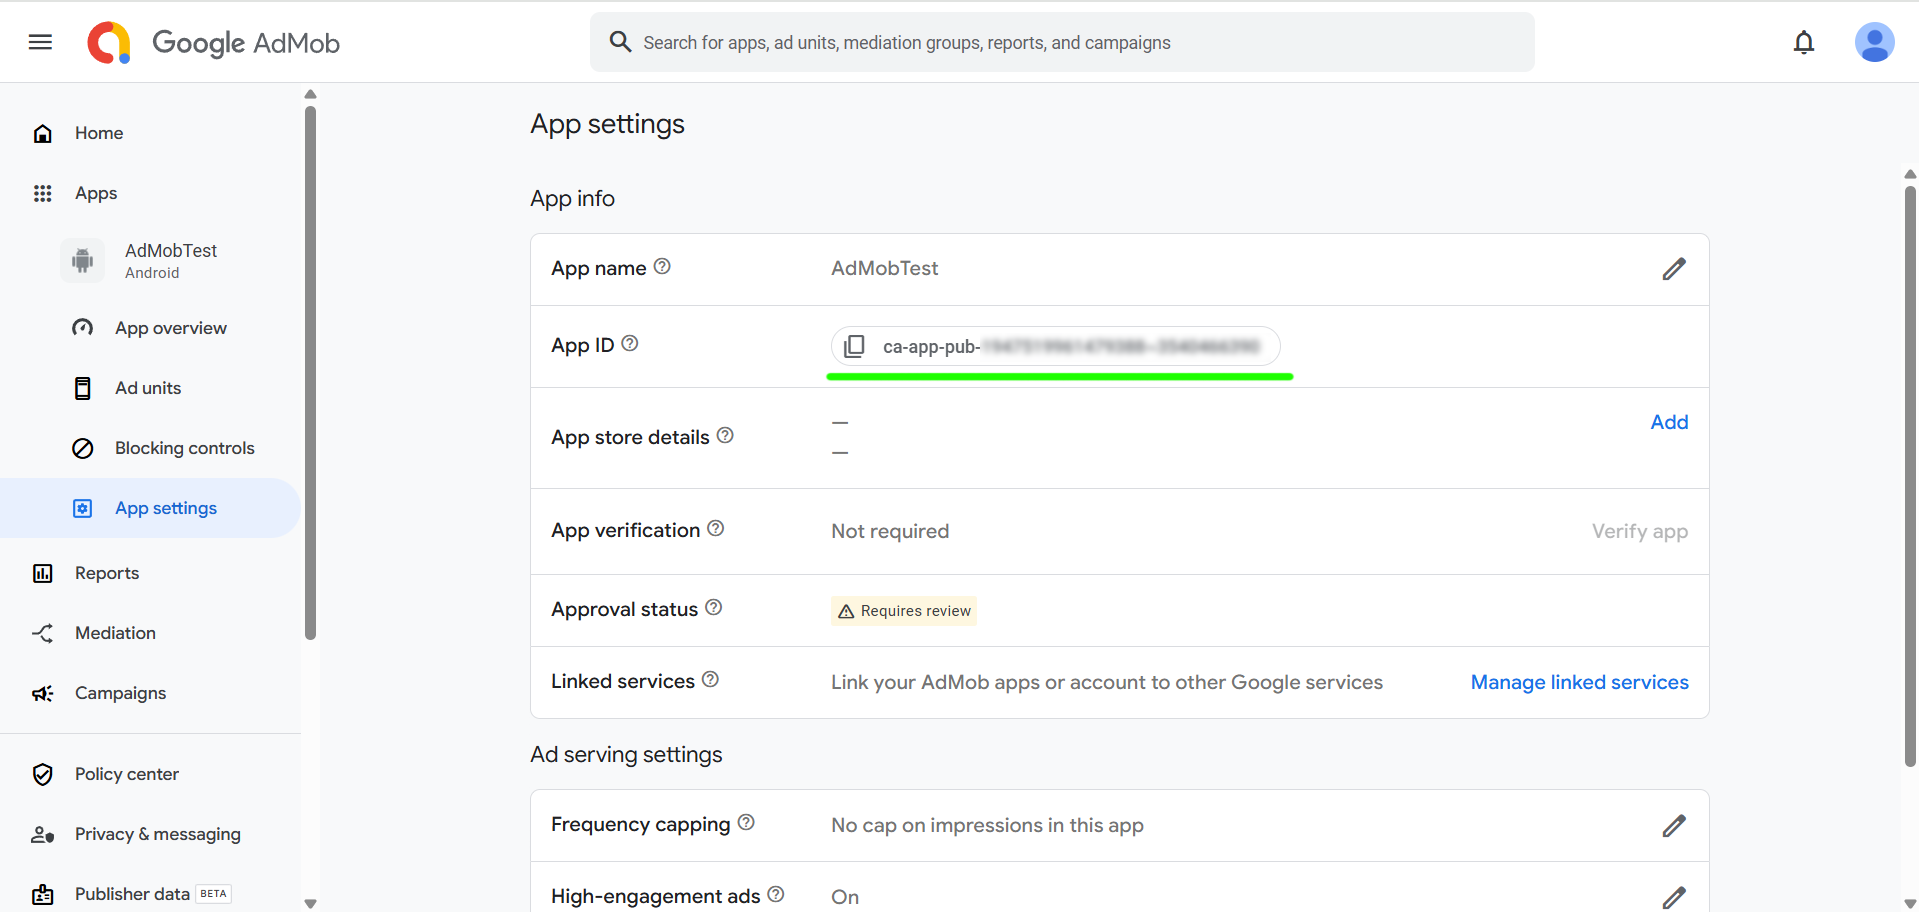
- Go to Apps and select the required application.
- Open App settings from the left sidebar.
- Copy the App ID displayed in the App info section.
An AdMob App ID uses the following format:
ca-app-pub-XXXXXXXXXXXXXXXX~YYYYYYYYYY
Configure the Plugin
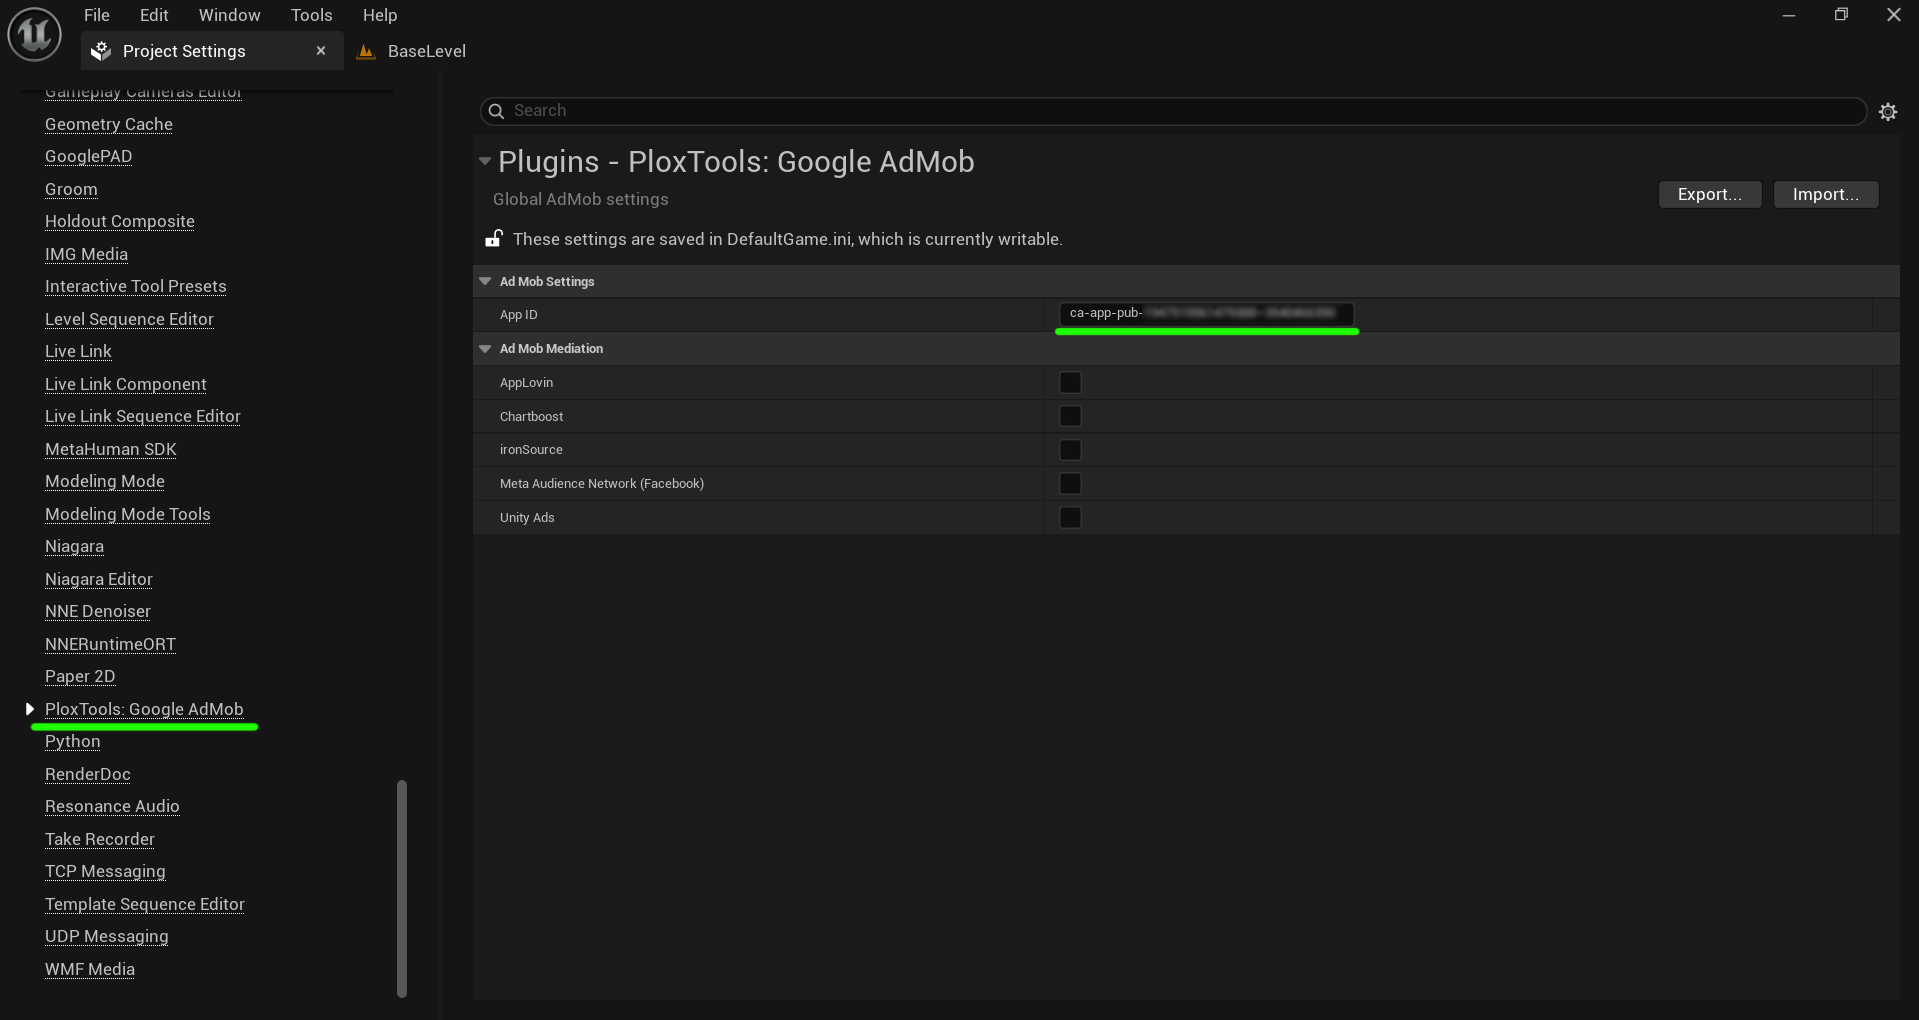
Open Project Settings → Plugins → PloxTools: Google AdMob → AdMob Settings.
Paste the App ID for the platform you are currently building into the App ID field.
During packaging, the plugin automatically adds the App ID to the required Android or iOS application configuration.
Before packaging, make sure the App ID field contains the App ID registered for the selected target platform.
Warning
Make sure you enter an App ID, not an Ad Unit ID.
iOS Requirements
For iOS builds, use:
- Xcode 16.0 or newer
- iOS Deployment Target 13.0 or higher
Set the minimum iOS version in:
Project Settings → Platforms → iOS → Minimum iOS Version
Note
Xcode 16.0 is the required Xcode version. It does not mean that the application's Minimum iOS Version must be set to 16.0.
Access AdMob Functions in Blueprints
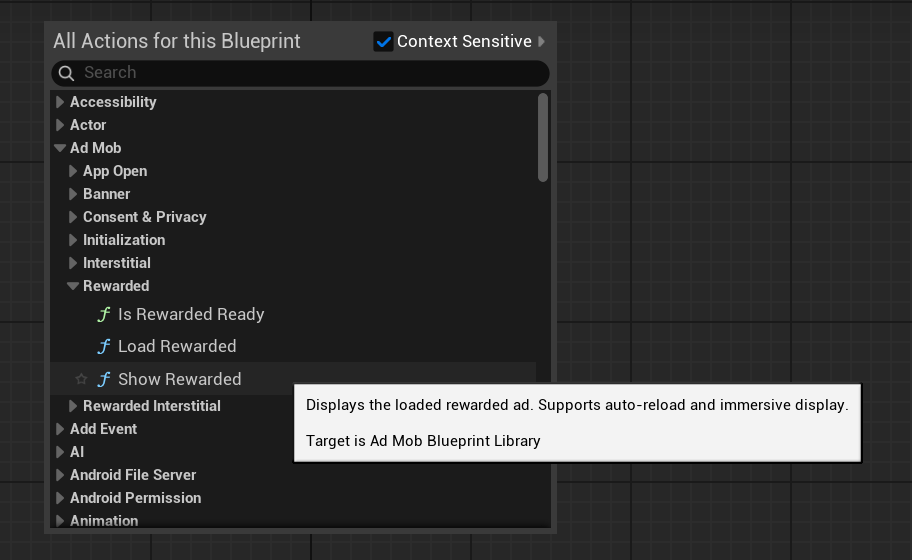
After the plugin is enabled, its functions are available directly in Blueprints.
To find them:
- Right-click inside a Blueprint graph.
- Search for the required function.
- Open the AdMob category to view the available nodes.
Ready to Use
The plugin is now installed and configured for the selected target platform.
Continue with Basic Usage to initialize AdMob, load an ad, and display it on a device.
During development, use the official test Ad Unit IDs listed in Testing. Do not use production Ad Unit IDs for testing.