Steam Publishing Tool Setup
This page explains how to prepare the Steam Publishing Tool until the dashboard is ready for publishing.
The setup process covers:
- opening the tool from the Unreal Editor;
- installing SteamCMD;
- setting the Steam username;
- authorizing a Steam developer account;
- configuring the required publishing settings;
- confirming that the setup status is ready.
The actual build upload process is explained on the Publishing a Build page. A detailed reference for every setting is available on the Settings page.
Step 1 — Open the Tool
After enabling the plugin, open your Unreal project and click Steam Publishing Tool in the Unreal Editor toolbar.
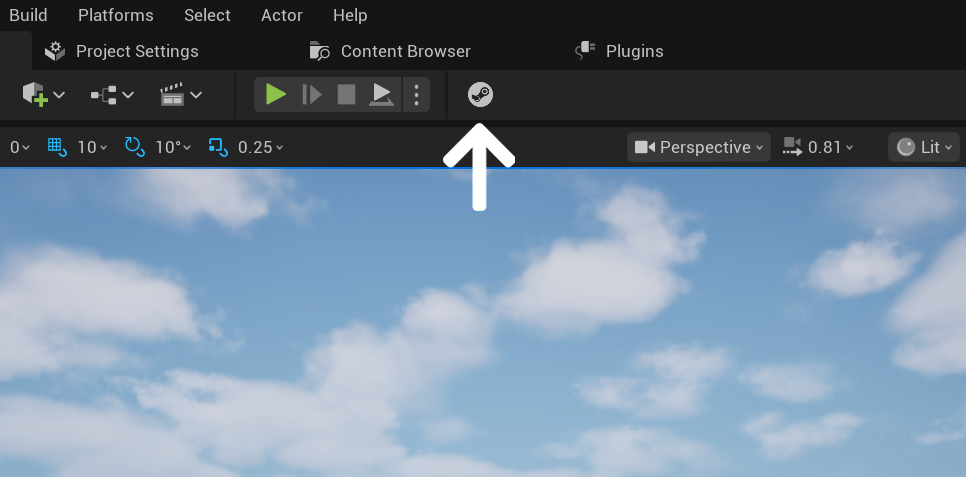
This opens the PloxTools Steam Publishing window.
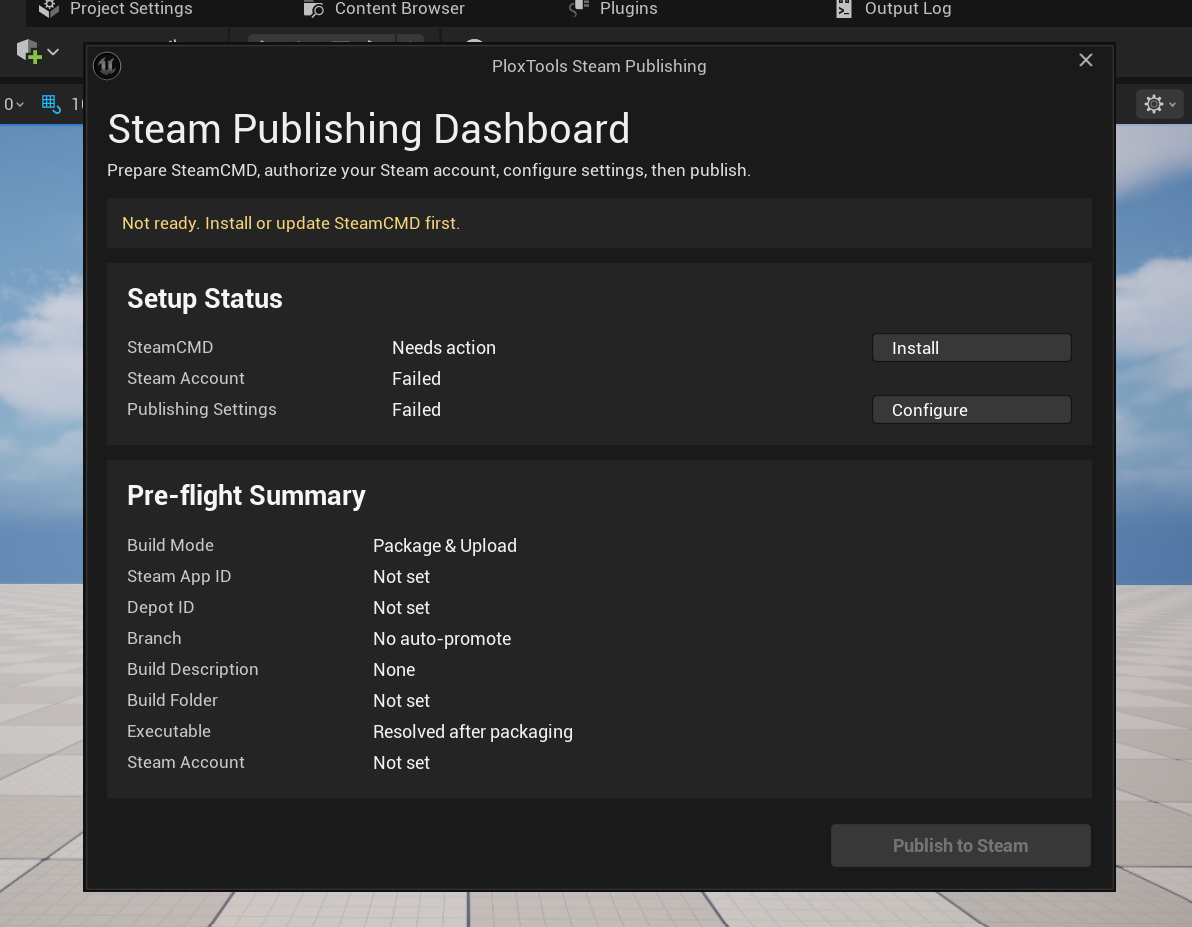
The dashboard shows the current setup state, the pre-flight summary, and the Publish to Steam button.
Step 2 — Install SteamCMD
SteamCMD is required for uploading builds to Steam.
When using the tool for the first time, or if the local SteamCMD files were deleted, SteamCMD must be installed again.
Click Install in the SteamCMD row.
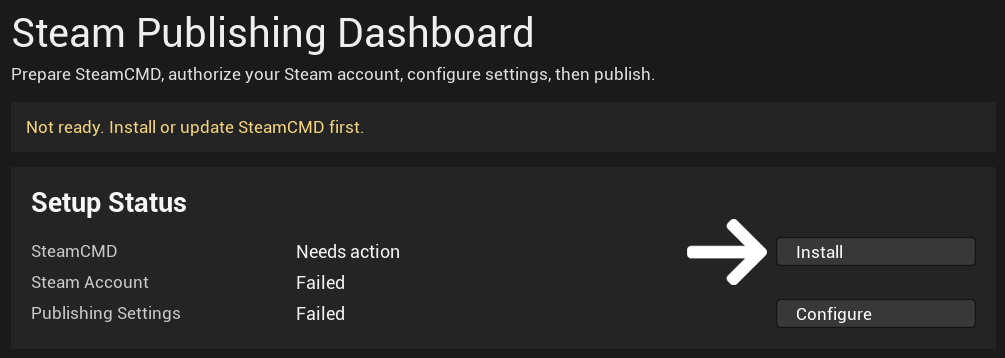
The installation is handled automatically by the tool. An internet connection is required because SteamCMD must be downloaded from Steam servers.
The tool installs SteamCMD inside the project Saved directory:
<Project>/Saved/PloxTools/SteamPublishing/SteamCMD/
The executable used by the tool depends on the editor platform:
Windows: steamcmd.exe
macOS:   steamcmd.sh
Note
SteamCMD may update itself during launch. This is normal SteamCMD behavior and may add extra output to the progress log.
Step 3 — Set the Steam Username and Authorize
After SteamCMD is installed, set the Steam username that will be used for publishing.
Click Configure in the Publishing Settings row.
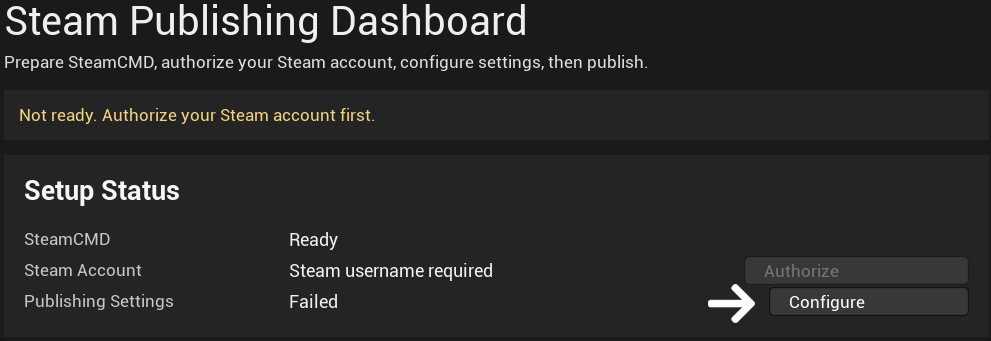
In the Account section, enter the Steam username for the account that will upload builds.
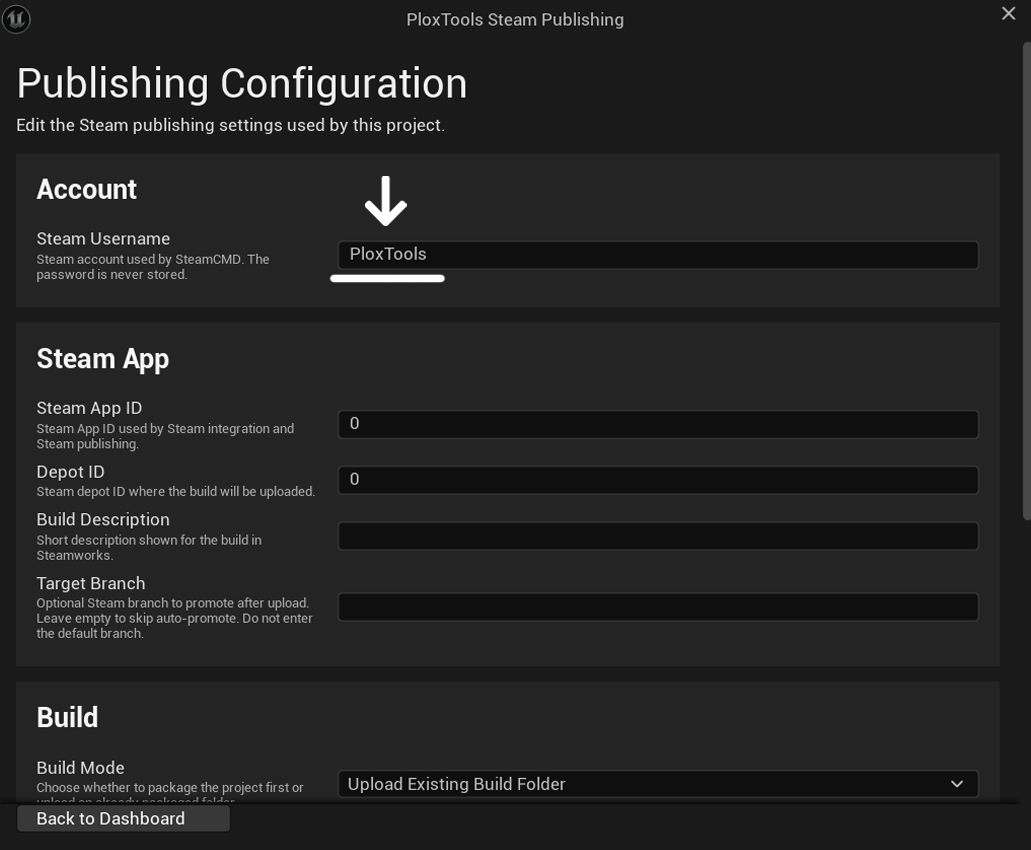
Use a Steam developer account that has access to the Steamworks application and permission to upload builds for the depot you will configure below.
Return to the dashboard and click Authorize in the Steam Account row.
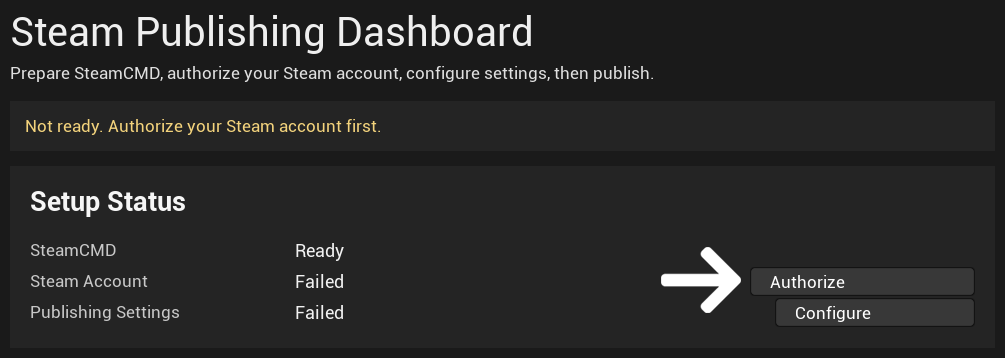
The tool first checks whether SteamCMD can log in with an existing local authorization token.
If the saved token is valid, no password is required.
If SteamCMD requires a password, the tool shows an inline password prompt.
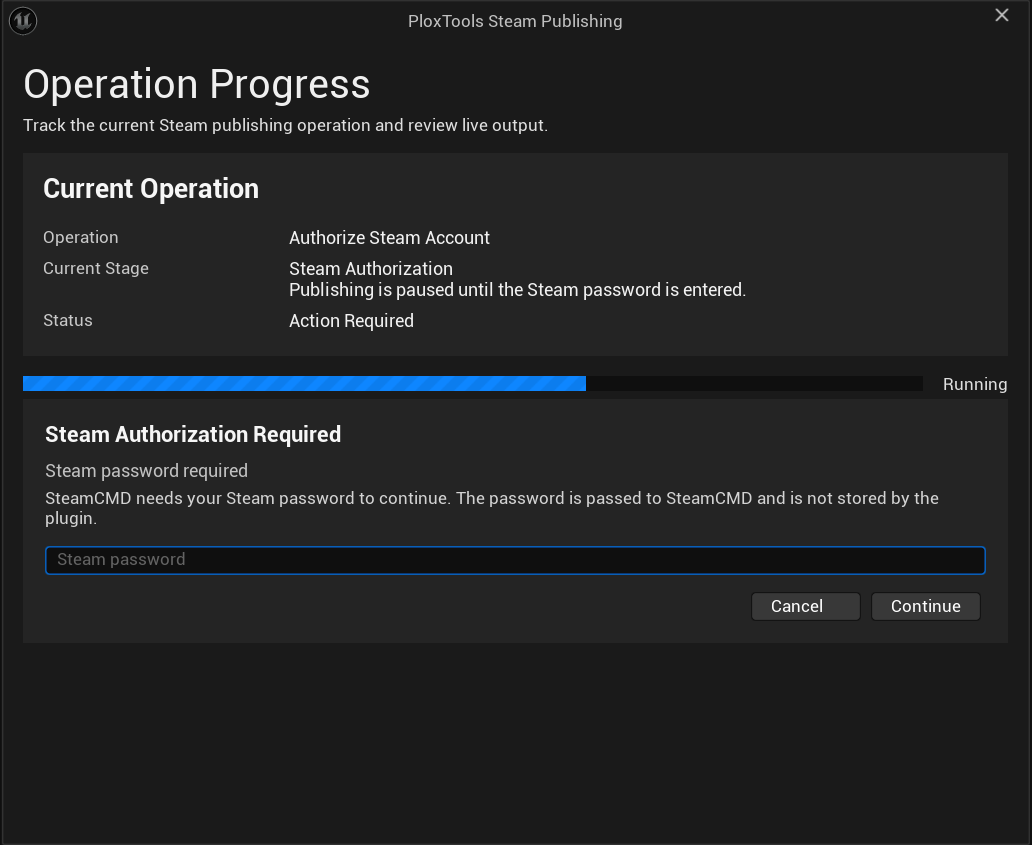
Enter the Steam password and click Continue.
Warning
The plugin does not store your Steam password. The password is passed to SteamCMD only for the current authorization attempt. After a successful login, SteamCMD may store its own local authorization token.
Steam Guard
If Steam requires Steam Guard verification, the tool shows an inline Steam Guard prompt.
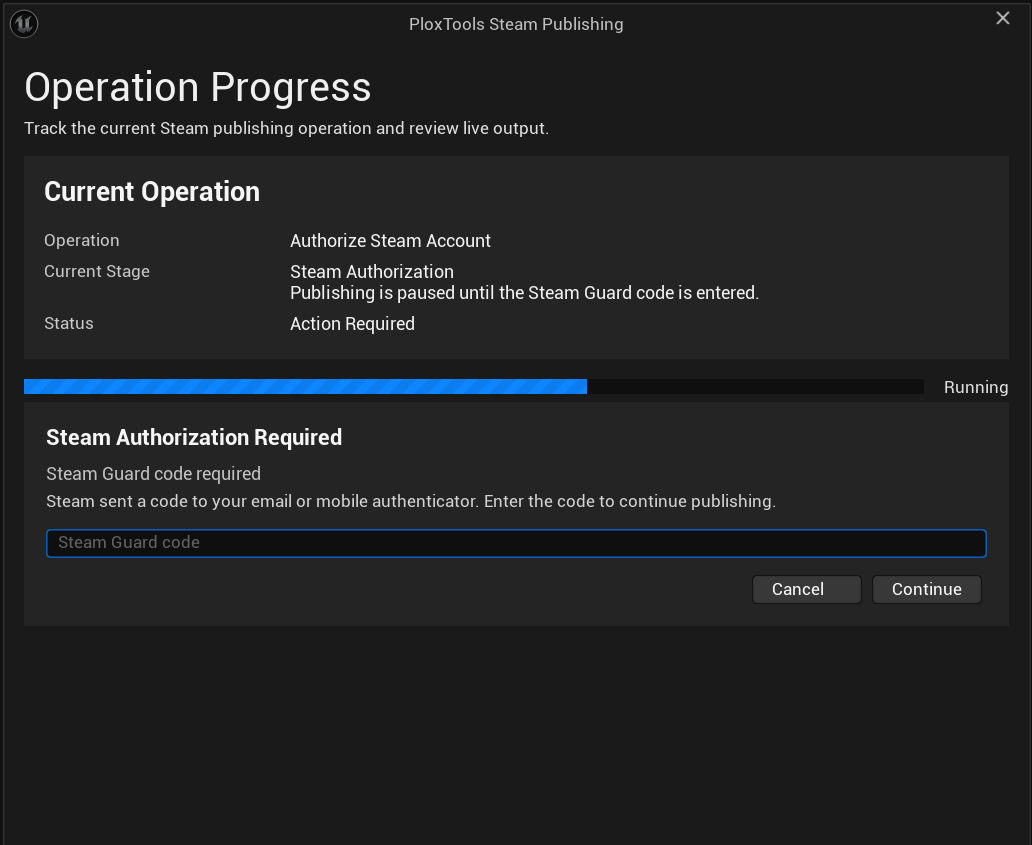
Enter the current Steam Guard code and click Continue.
Steam Guard codes can expire quickly. If the code is rejected, wait for a fresh code and try again.
Step 4 — Configure Required Publishing Settings
After SteamCMD is installed and the Steam account is authorized, configure the publishing settings required for the upload workflow.
Click Configure in the Publishing Settings row if the configuration screen is not already open.
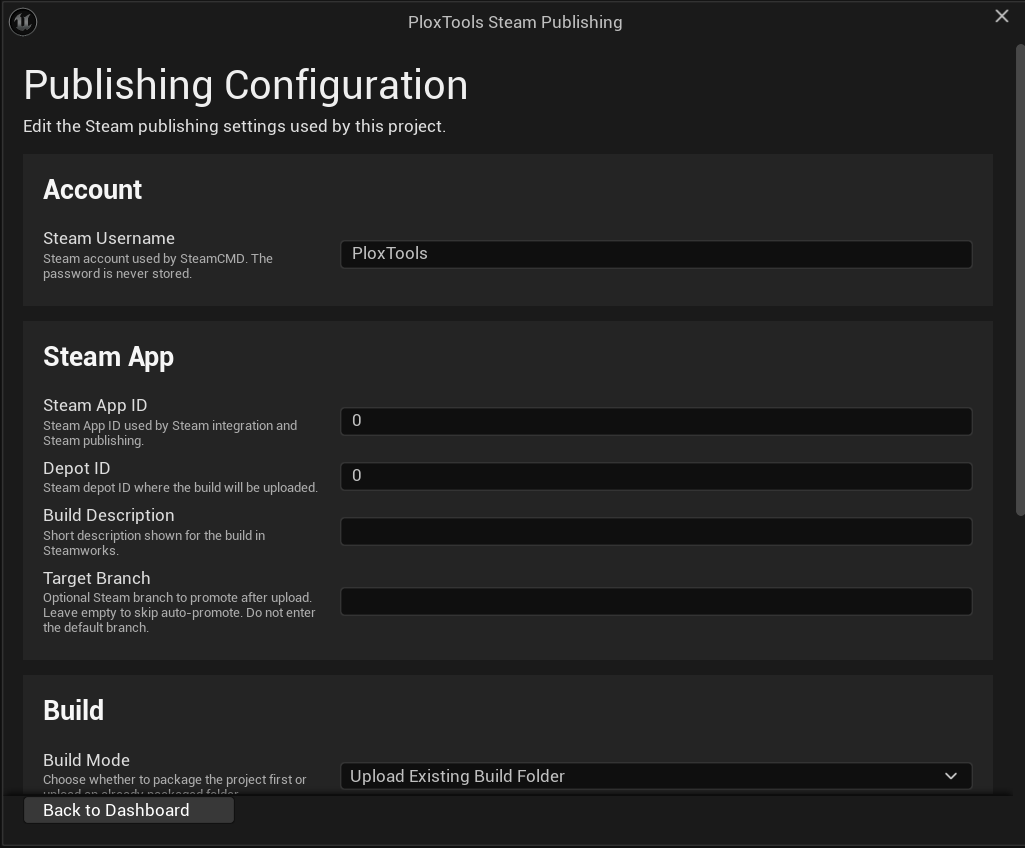
The required settings are Steam App ID, Depot ID, Build Mode, and the build path used by the selected build mode.
Steam App ID and Depot ID
You can find the Steam App ID and Depot ID in Steamworks.
Open your application settings in Steamworks and go to:
SteamPipe → Depots
The application name at the top of the page shows the Steam App ID. The depot list shows the available Depot IDs.
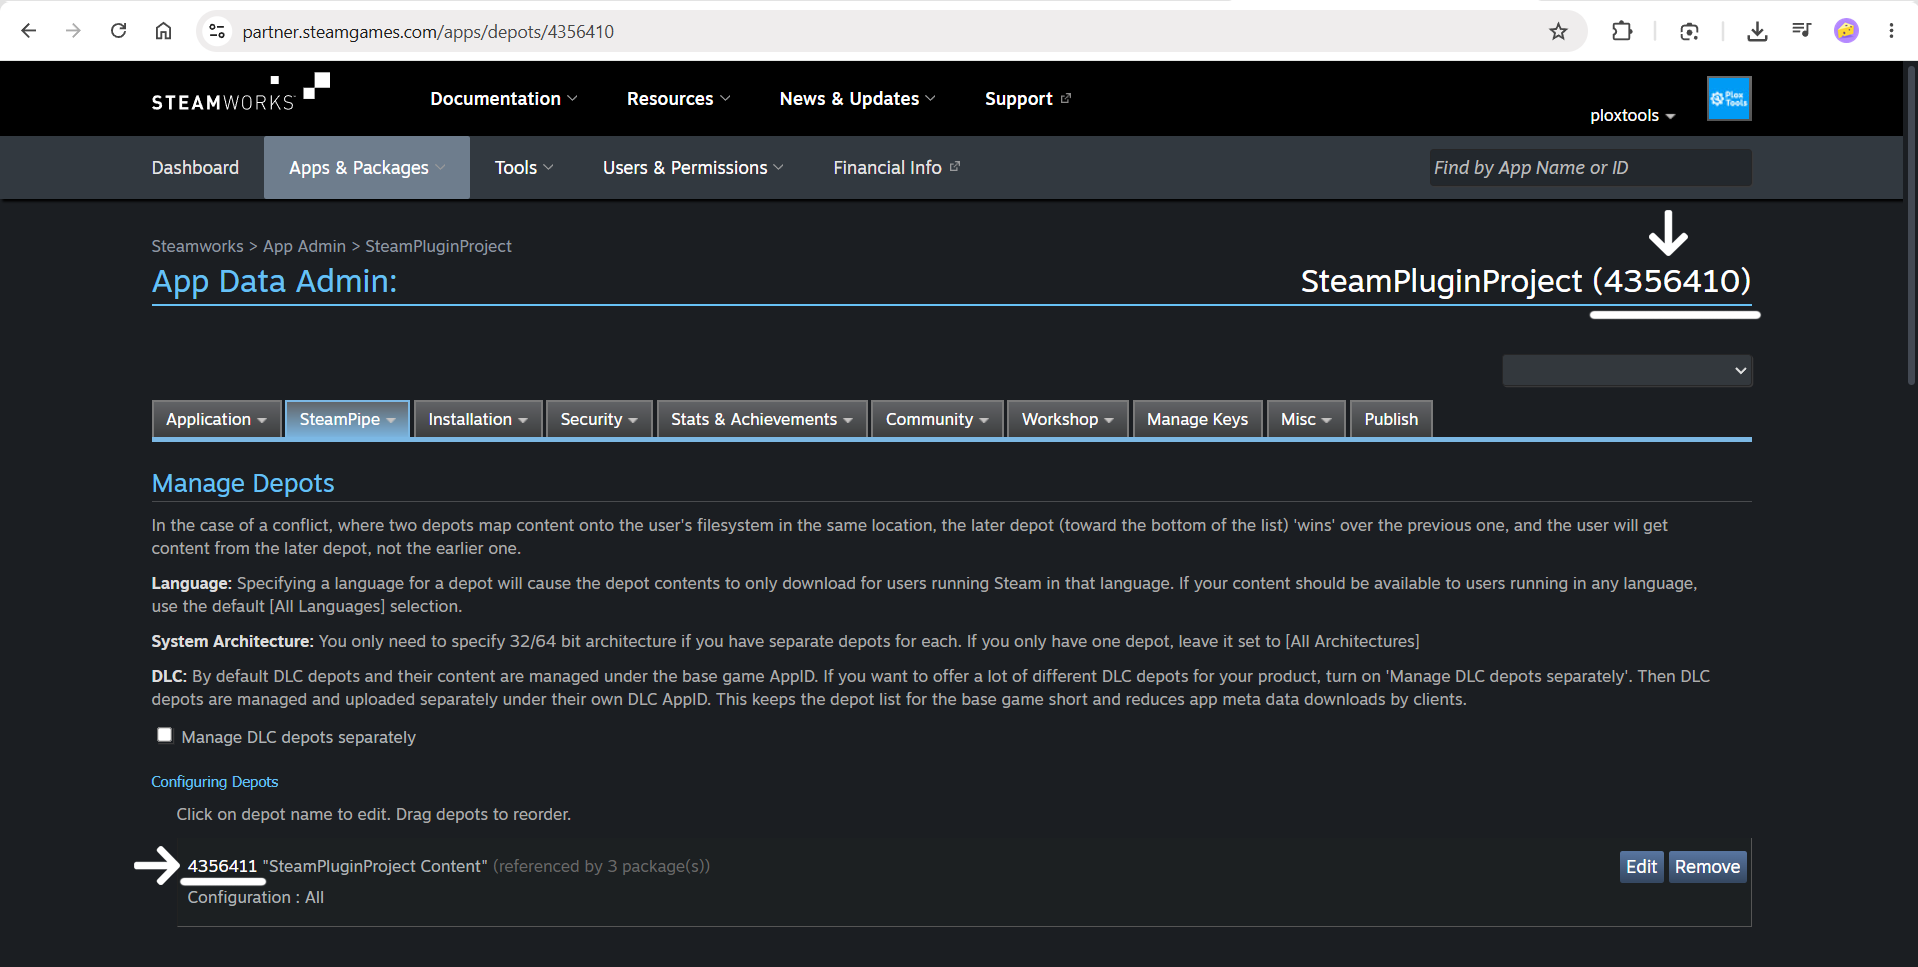
Enter these values in the publishing settings:
- Steam App ID — the Steamworks application that will receive the uploaded build.
- Depot ID — the Steam depot where the build files will be uploaded.

The Steam account used for authorization must have permission to upload builds for this app and depot.
Build Mode
Choose the build mode based on how you want to prepare the build.
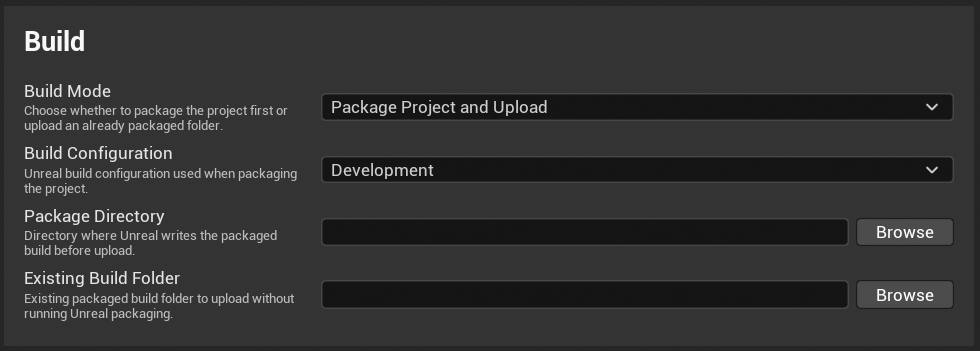
Package Project and Upload packages the current Unreal project first, then uploads the packaged result to Steam. Use this when you want the tool to handle the full workflow from the editor.
Upload Existing Build Folder uploads an already packaged build folder. Use this when you packaged the project manually, or when the build was produced by another machine or build pipeline.
Build Paths
The required path depends on the selected build mode.

For Package Project and Upload, set Package Directory. This is where Unreal Engine will write the packaged build before the upload starts.
For Upload Existing Build Folder, set Existing Build Folder. This must point to an already packaged build folder.
Make sure the selected path is correct before publishing. On Windows, the build folder should contain the game .exe. On macOS, it should contain the packaged .app bundle.
Optional Fields
You can also set:
- Build Description — a short description shown for the uploaded Steam build.
- Target Branch — an optional Steam branch to set live after upload.
Leave Target Branch empty if you only want to upload the build without automatically promoting it to a branch.
Do not use default as the Target Branch. Valve does not allow setting the default branch live through this SteamCMD option.
For a detailed explanation of every setting, see Settings.
Step 5 — Check Setup Status
After the required settings are configured, return to the dashboard.
The setup status should show that the required parts are ready:
- SteamCMD is ready.
- Steam Account is authorized.
- Publishing Settings are valid.
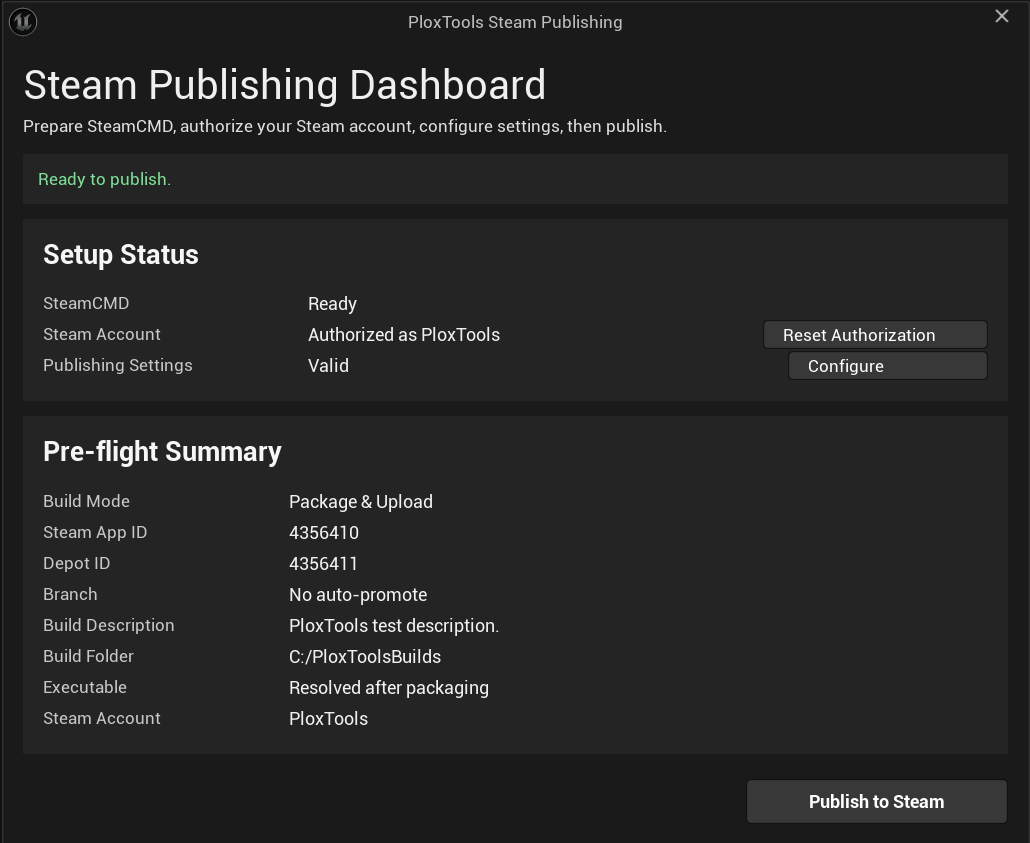
Review the Pre-flight Summary before publishing. It shows the selected build mode, Steam App ID, Depot ID, branch behavior, build description, build folder, executable, and Steam account.
At this point, the Steam Publishing Tool is ready to use.
The next step is to publish the build. See Publishing a Build.